Logging In & Demo Site
You're welcome to log in to play along at home using the guide below, or just read and learn how the software works.
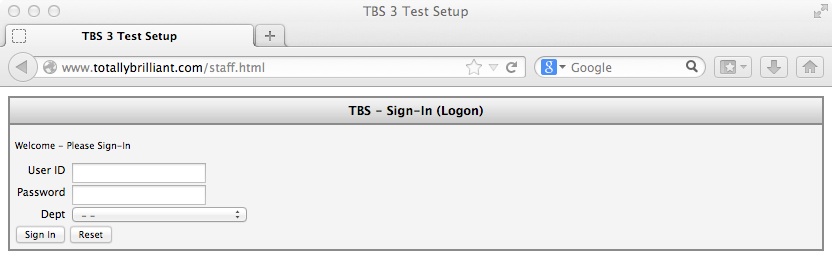
To test TBS3 live, go to the relevant online demo page here. You should be at a log in screen; for the demo, use a User ID of 'TBSDEMO' with a password of 'totallybrilliant'.
Note that the User ID field is auto capitalised; the password is not and remains case-sensitive. Where there are optionally multiple departments available, these will be shown in a dropdown list in the login screen. Upon successful logging in, you will get :
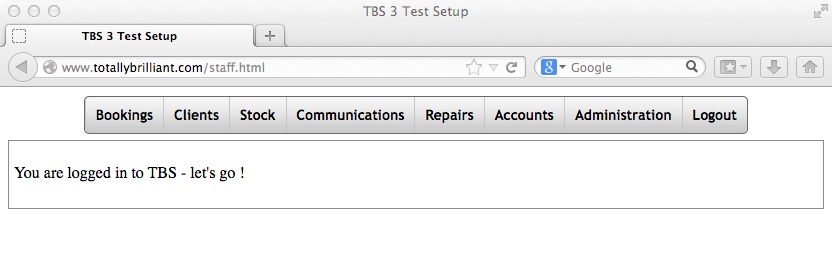
The menu options follow as per TBS2 navigation - where each user is set up as part of specific 'groups' and the groups determine which options the user has access to, and only those accessible to the user are displayed in the menu options
The menu options largely follow the same as TBS2 but with the exception of a new Bookings option 'Quick Booking' :
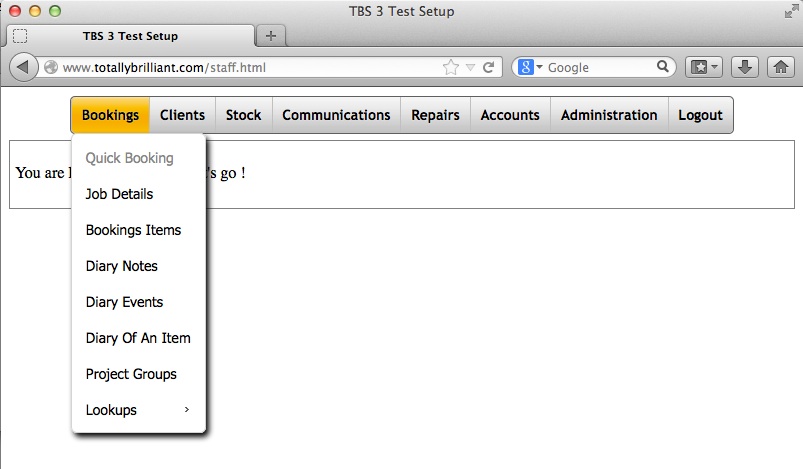
Quick Bookings
This screen - as its name implies - is designed to let you set up a new booking quickly and easily - you start with a list of your stock types :

..and from which you can click on any type to see its description contents
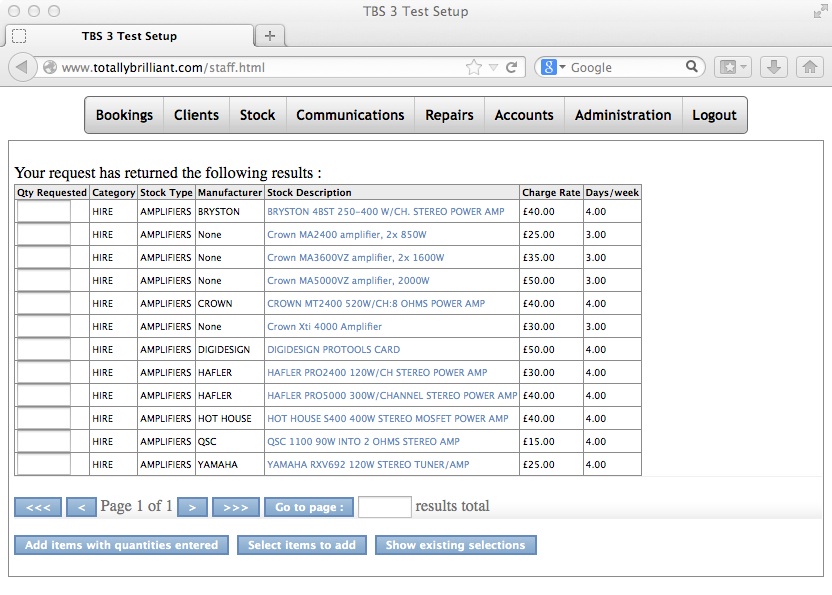
....or enter in anything you like in to the text entry search field to search throughout TBS :
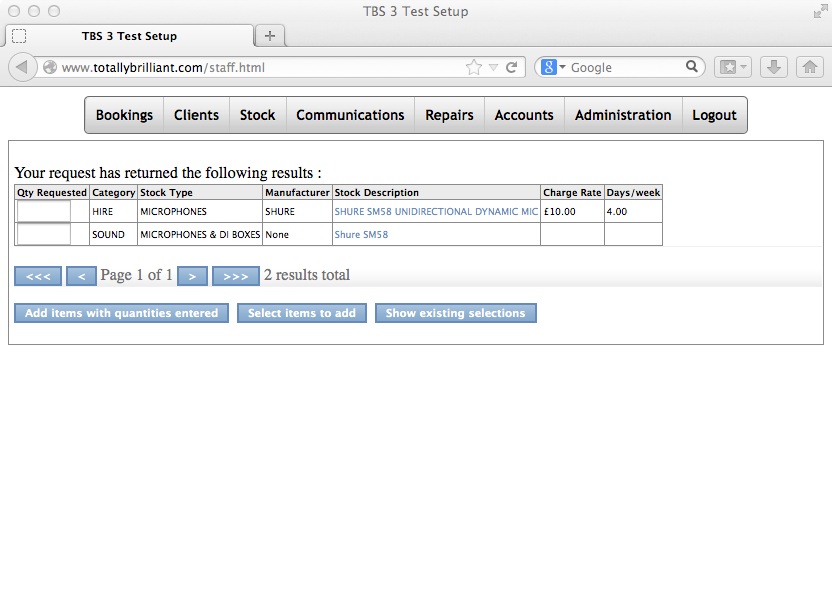
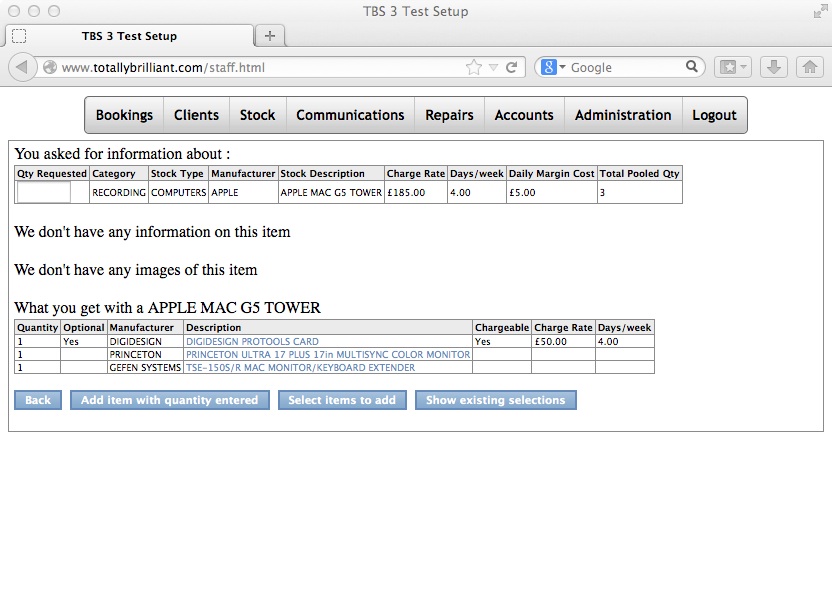
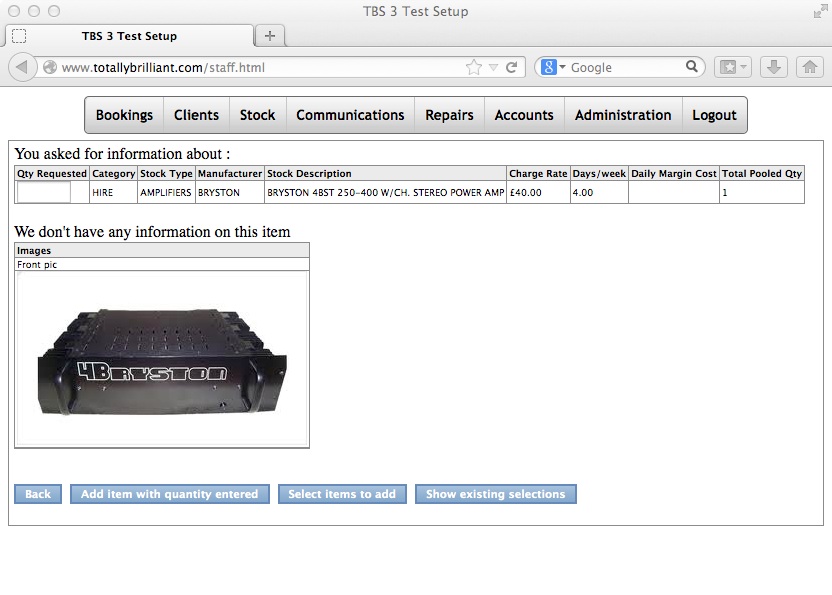
Clicking on the description itself will show you more information about the item, such as if it has any other pieces linked to it, or images or other information, etc :
Editing A New Booking
Entering a required quantity against any item(s) and clicking on the 'Add items with quantities entered' button adds your selection to the existing list of requirements for this new booking:
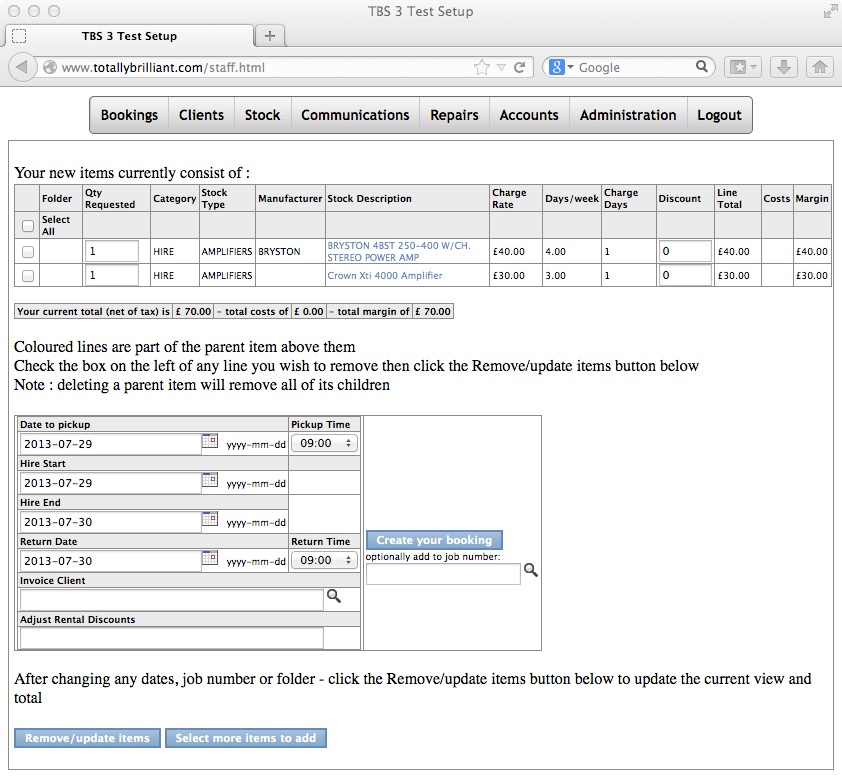
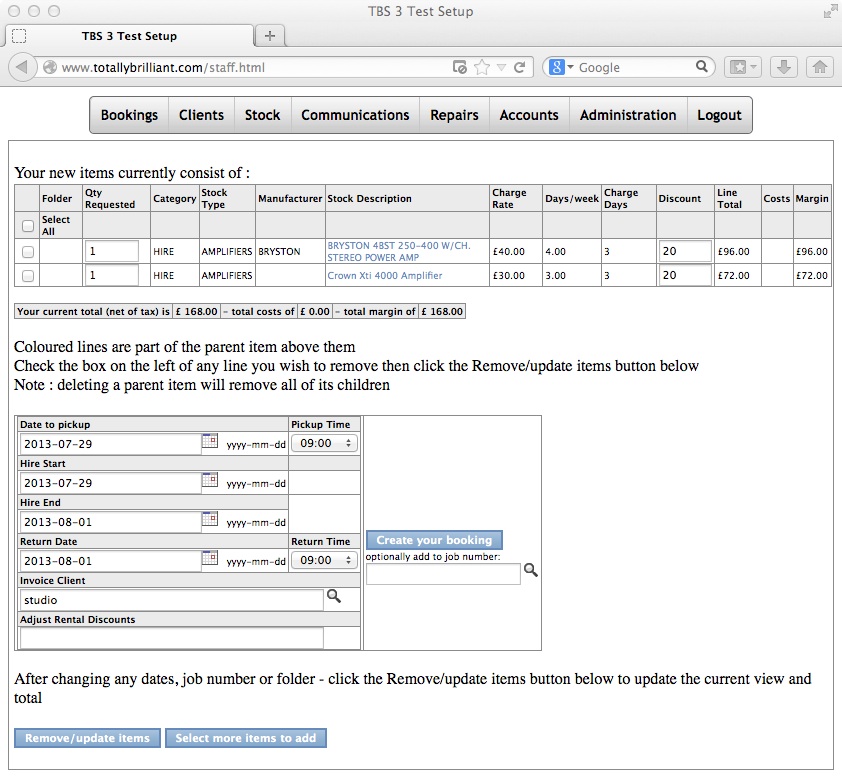
From here you will see that is easy to remove any lines you no longer need, or to amend the Quantity requested, or discount on each line - clicking on the Remove/update items button will refresh your new booking values for you.
Dates can be hand entered (you will need to keep to the displayed date format !) or by clicking on the calendar icon at the right of each date - as you choose a date, any required other changes will automatically follow to ensure dates are valid for final entry.....as dates are changed, so too does the value of items and the job as a whole
To set a discount across all (rental) items of the booking, enter your discount value in the 'Adjust Rental Discounts' field :

Then click the Remove/update items button to refresh your new booking:

Saving a Booking
Once you are happy with the items as displayed, in order to save this to a booking, you need either : a client name to be entered in the Invoice Client field (which will create a new booking), or : a job number to be entered in the job number field which will then add your new set of items to that booking (Note: when choosing to add items to an existing booking, you can optionally set a specific folder from that job in which to add your new items - the folder list is displayed once you have selected a booking number)
To set an invoice client for the booking, enter a part of the clients name in the 'Invoice Client' field:
Note : your browser should allow the use of pop-ups for this site ! Once a value has been entered, tabbing out of the field will show a pop up screen displaying all matching known client entries from which you can select the correct client:

Once selected, the pop up window is dismissed and your client is displayed in the bookings screen:
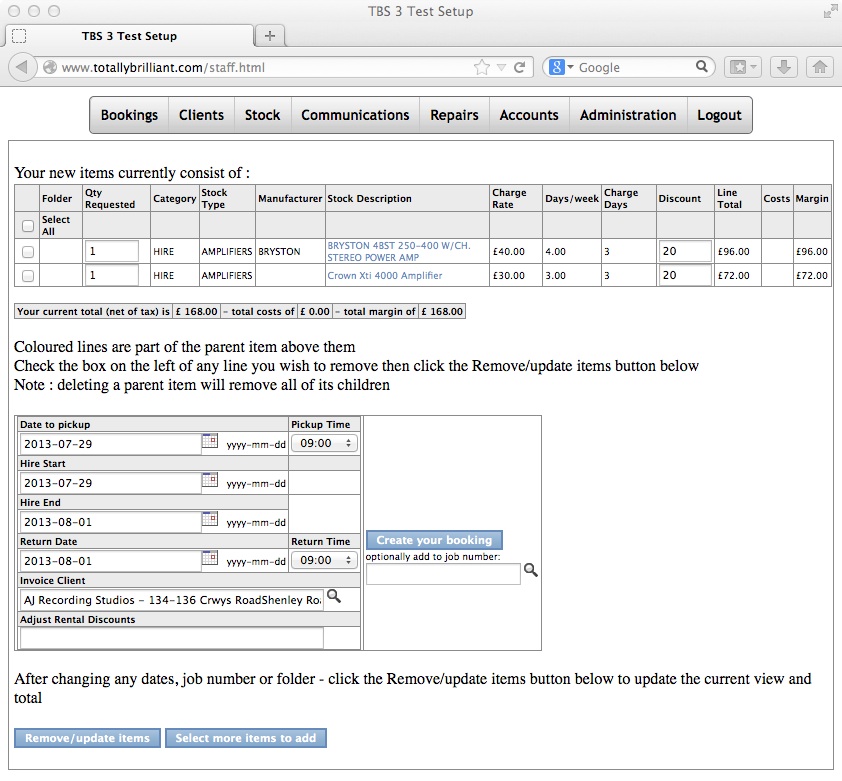
To finish creating your booking, simply click on 'Create your booking':
